
ZAP, a Credible Alternative to BURP Suite?
Who in the web security world hasn’t heard of ZAP? Initially supported by OWASP, Zed Attack Proxy (ZAP) is an open-source tool dedicated to web application security testing. More specifically, it is a web interception proxy that includes, among other features, a passive and active vulnerability scanner.
Free and accessible, ZAP is a credible alternative for those who do not have access to Burp Suite Professional, the standard in the field. Compared with the Community version of Burp Suite, which does not include a vulnerability scanner, ZAP has a number of solid advantages.
In this article, we’ll explore ZAP by getting to grips with its interface. We’ll also take a closer look at the proxy’s key features (interception, modification and replay of requests) and the vulnerability scanner.
Comprehensive Guide to ZAP (Zed Attack Proxy)
Introducing ZAP
How does ZAP work?
At start-up, the ZAP interface looks like this:
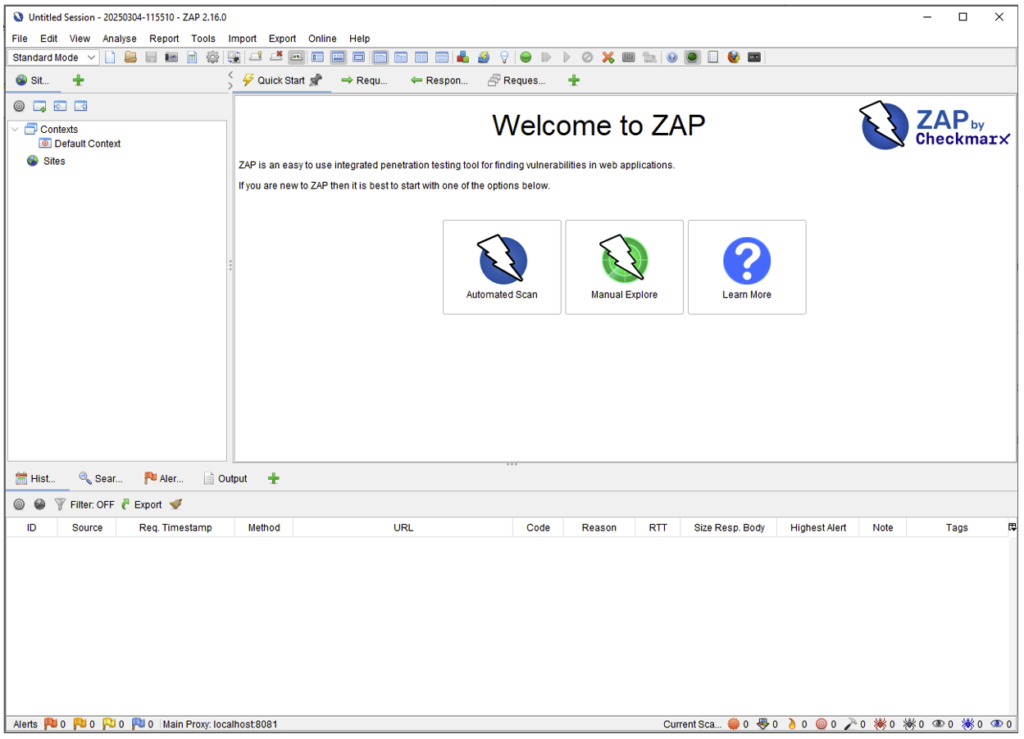
Before exploring the interface, let’s start by capturing web traffic. This will be more meaningful once we have data to analyse.
ZAP has two modes of operation:
- Automatic scan: it scans the site and tests for vulnerabilities based on a simple URL. This approach is fast, but lacks precision and control. It is therefore not recommended.
- Manual exploration: ZAP acts as a proxy between the browser and the server. The auditor can observe and manipulate the exchanges, then run targeted tests using the built-in tools.
ZAP simplifies use by integrating a pre-configured browser (Chrome or Firefox). No proxy or certificate settings are required.
To get started, go to ‘Manual Explore’, enter the URL of the site you want to test and then ‘Launch Browser’.
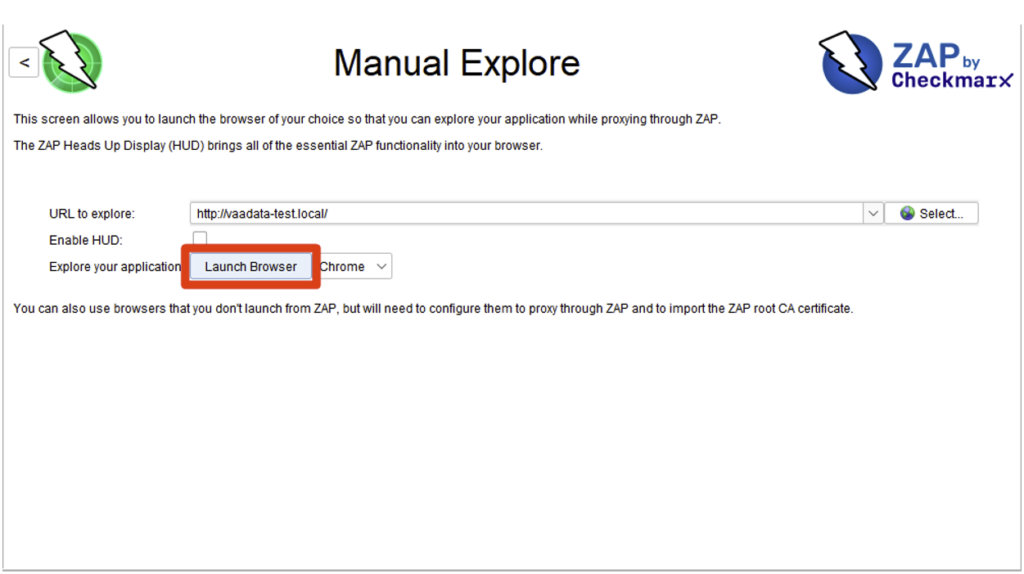
The browser opens and loads the site. If the ‘Enable HUD’ option is activated, an interactive interface is displayed. You can leave it by clicking ‘Continue to your target’.
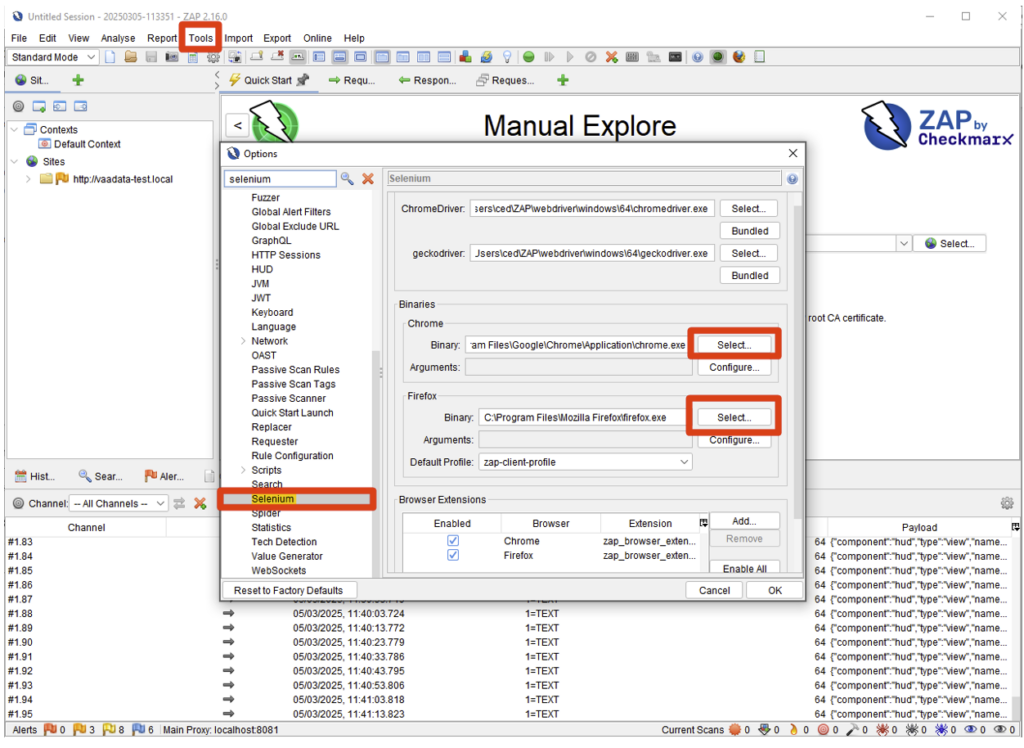
NB: If ZAP displays the error ‘the provided browser was not found’, you can define the path to your browser via Tools > Options > Selenium > Binaries.
Understanding ZAP’s interface
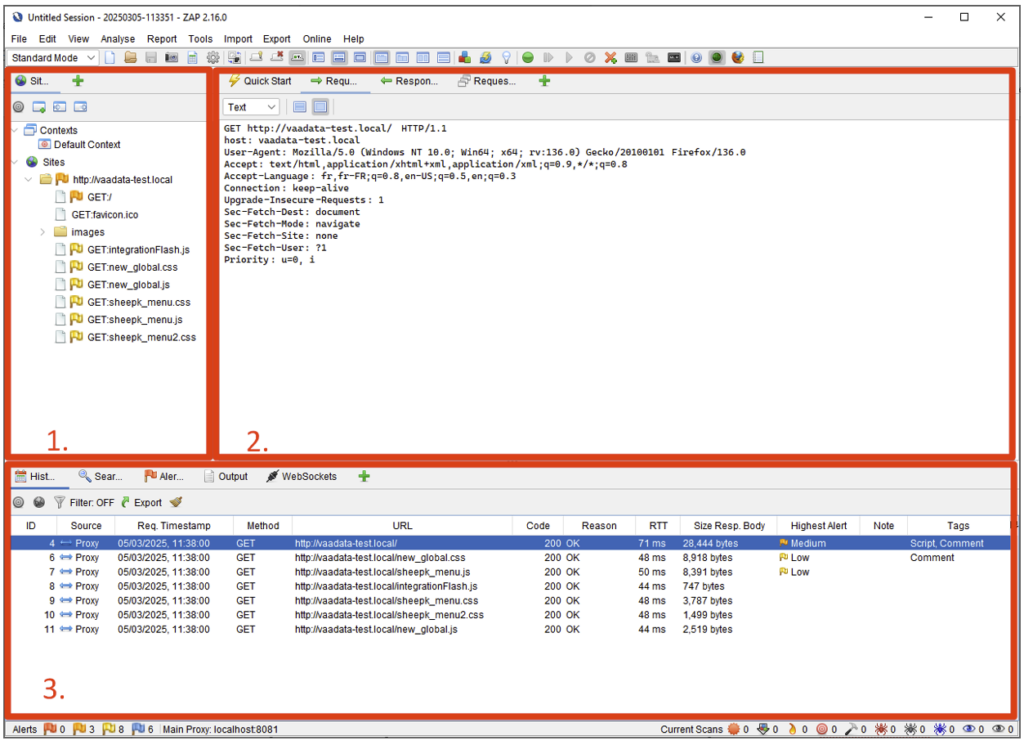
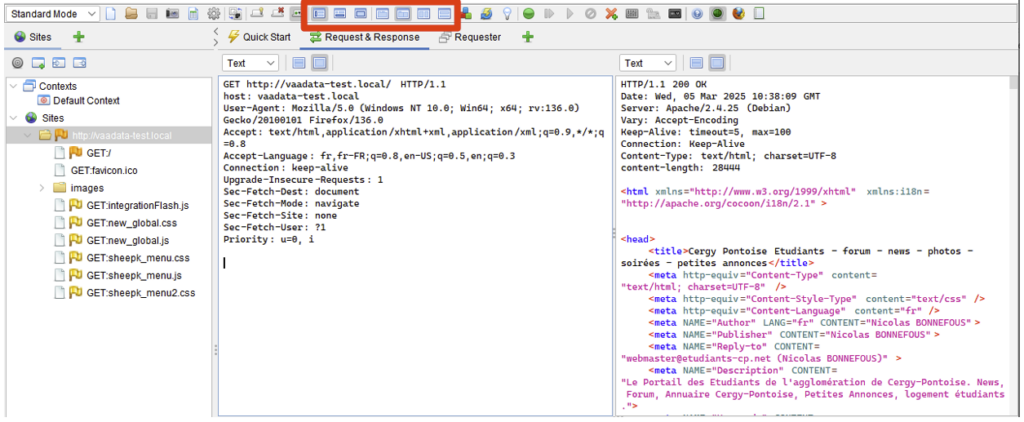
The interface is divided into three zones:
- On the left (1), we have the structure of the sites explored (here vaadata-test.local) and the resources loaded (CSS, JS, etc.).
- At the bottom (3), we see the history of requests made by the proxy. Here we see the first request to the site root, followed by successive requests to the various resources. This area can accommodate other types of data, via the various tabs. We’ll look at these later.
- In the centre (2), we have details of HTTP exchanges. This area displays the requests sent and the responses received. Select a request in the left (1) or bottom (3) panel to see its contents in the ‘Request’ and ‘Response’ tabs. In our example, the request displayed is the one made by the first exchange (ID 4), selected at the bottom.
The interface can be customised using the toolbar. You can reorganise the panels or display the requests/responses side by side to make them easier to read.
From these 3 panels, you can call up most of the features. To do this, you’ll need to use the various contextual menus (right-click!) that are available.
Before we look at the different features, there are two things to note about panel 3.
There’s the ‘Alerts’ tab, which brings together the various items discovered by ZAP’s scanners. It’s the equivalent of issues in Burp. What’s more, it can contain more tabs, which will open as you use ZAP.
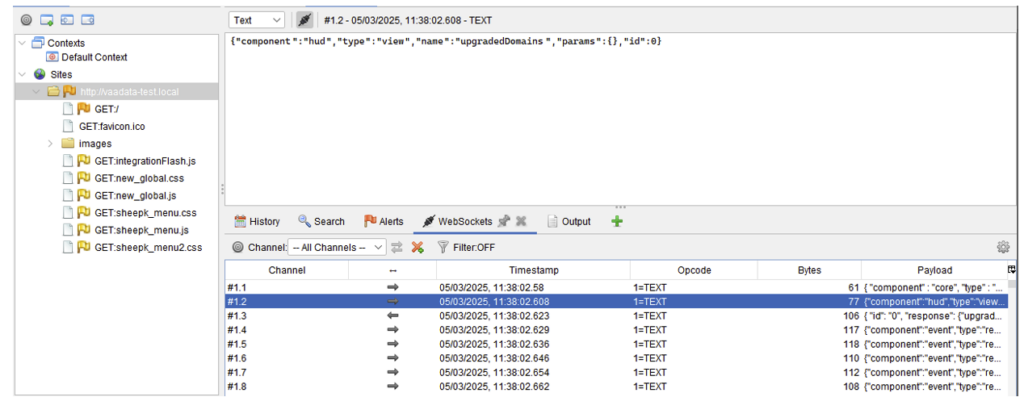
Finally, ZAP also manages Websockets. To view them, a tab is available in the bottom panel:
Exploring ZAP’s Key Features
ZAP provides all the basic features you would expect from an interception proxy. They enable requests to be intercepted, replayed or modified. It is also possible to automate the sending of requests.
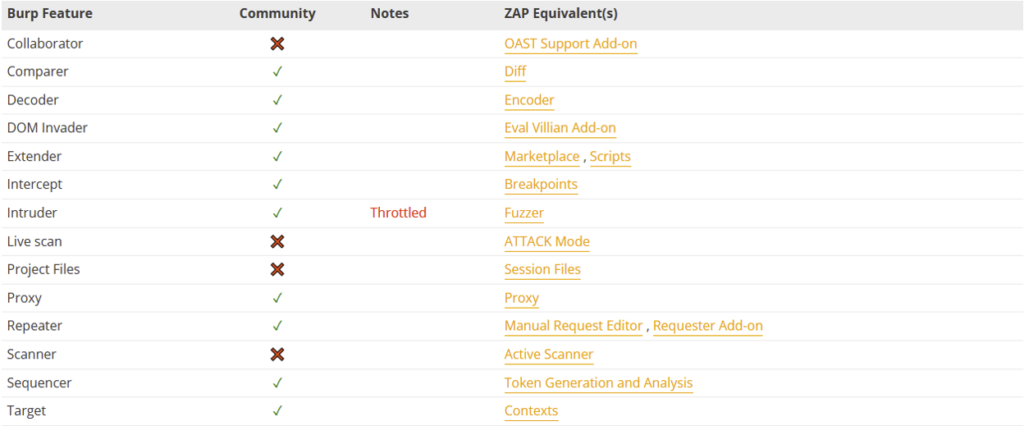
Although their features are similar, Burp Suite and ZAP use different terminology. For users familiar with Burp Suite, here is a table summarising the equivalences:
In this section, we’ll look at how to use Breakpoints, Manual Request Editor, Fuzzer and Active Scanner.
Breakpoints
Breakpoints can be used to intercept (block) requests before they are sent to the server, or responses before they are interpreted by the browser. This enables them to be modified before they are sent, or to prevent them from being sent.
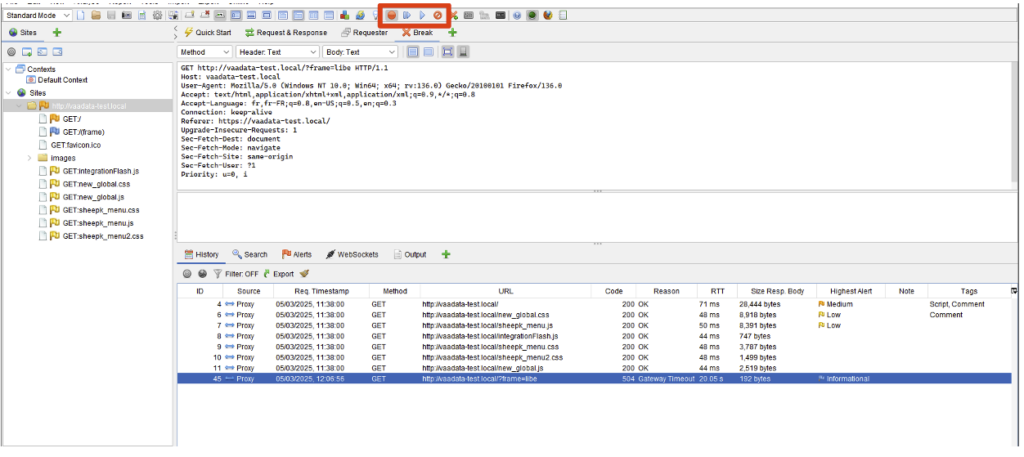
To activate breakpoints globally and intercept all requests, click on the ‘break’ button in the toolbar:

Once activated, intercepted requests will appear in the ‘Break’ tab.
You can then edit them directly from this tab, then use the following buttons to transfer (or block) the request.
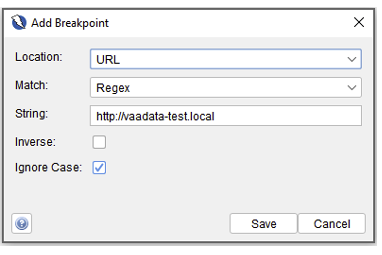
To activate a specific breakpoint on a perimeter, this can be done from the Sites panel, or via the ‘Add a custom HTTP breakpoint’ button in the toolbar:

It is then possible to select specific routes or requests that match certain criteria using a regular expression:
Manual Request Editor
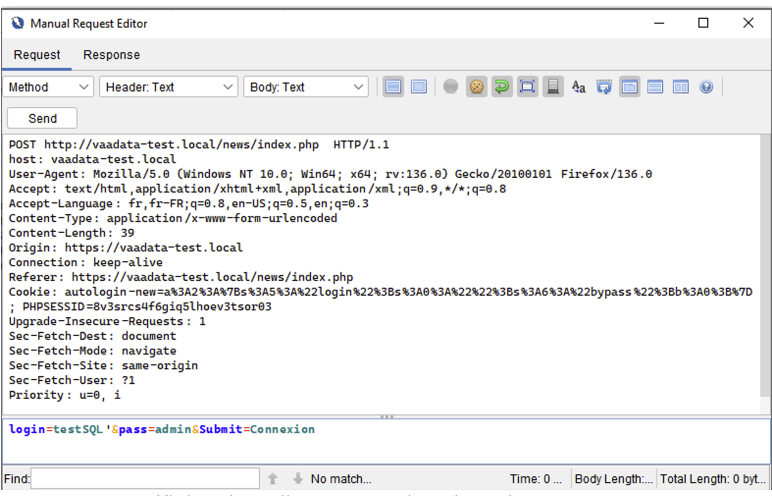
To replay a request, simply use the ‘Open/Resend with request editor’ option, available in the context menu.
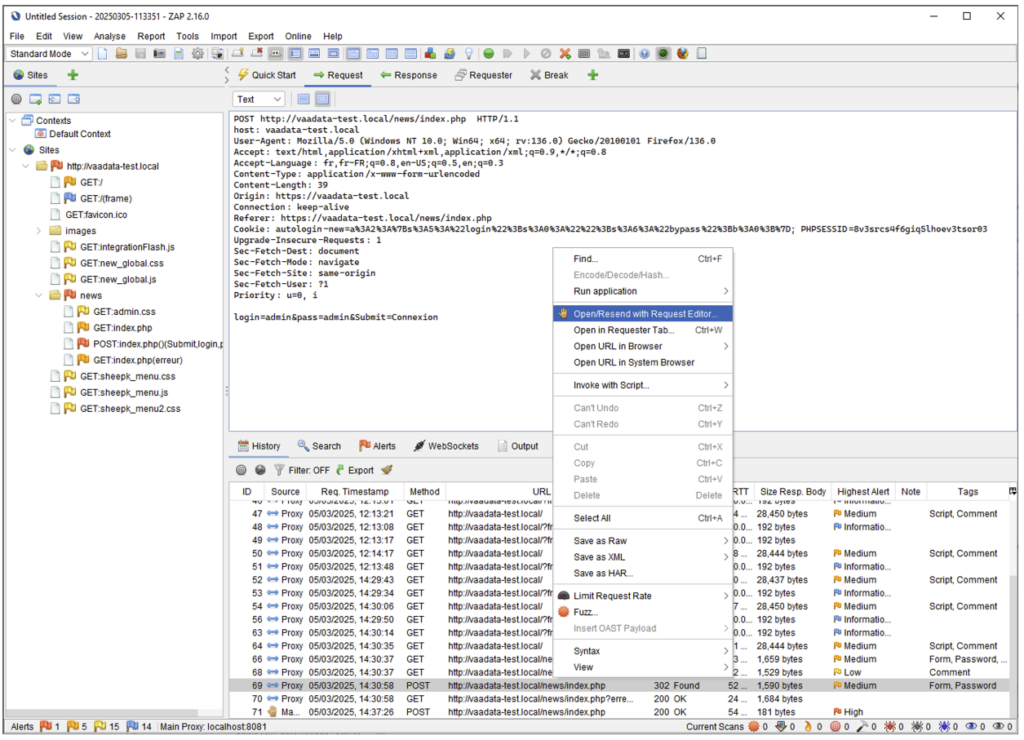
In the window that opens, you can edit the request, then click on ‘Send’ (or press ALT+Enter) to resend the request.
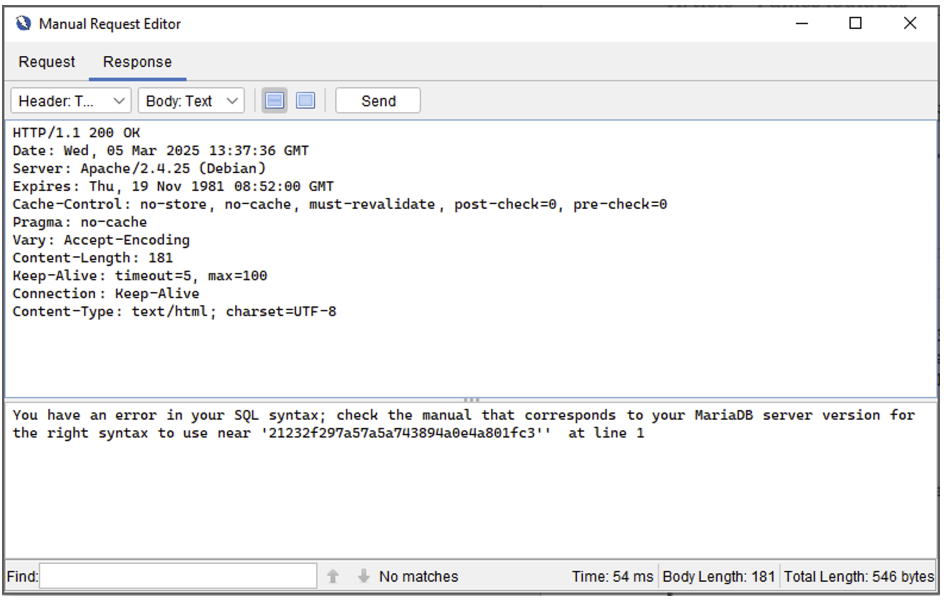
The response is then displayed directly in the response tab:
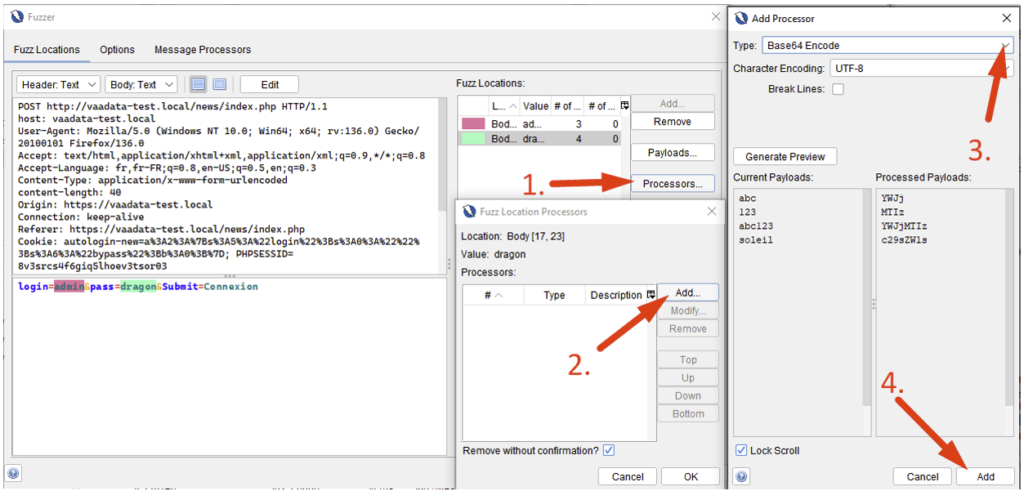
Fuzzer
To send several requests (dictionary or brute force attack), the tool to use is called Fuzzer.
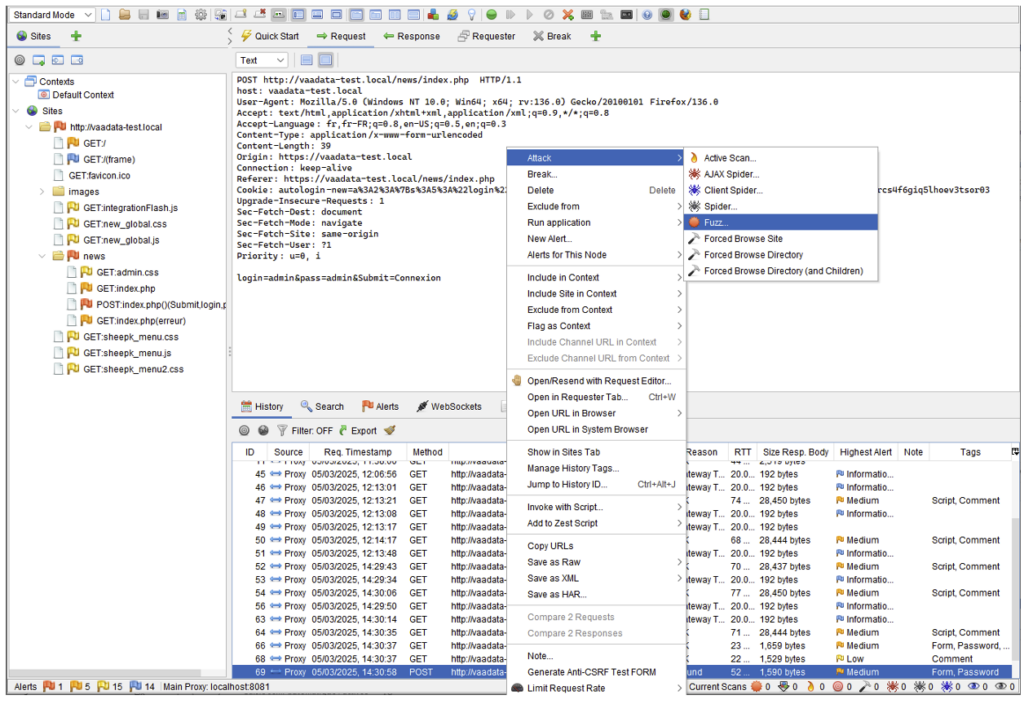
NB: the context menu sometimes looks different depending on where you click. For example, it is also possible to invoke the Fuzzer by clicking on the content of the request, then selecting Fuzz… directly. So here’s a little tip: if the action you’re looking for doesn’t appear, right-click on your request in different places (content, history at the bottom, sites on the left).
In the window that opens, you now need to select the place where you want to inject your loads. To do this, select a location in the request by positioning the pointer or highlighting the area, then click Add… :
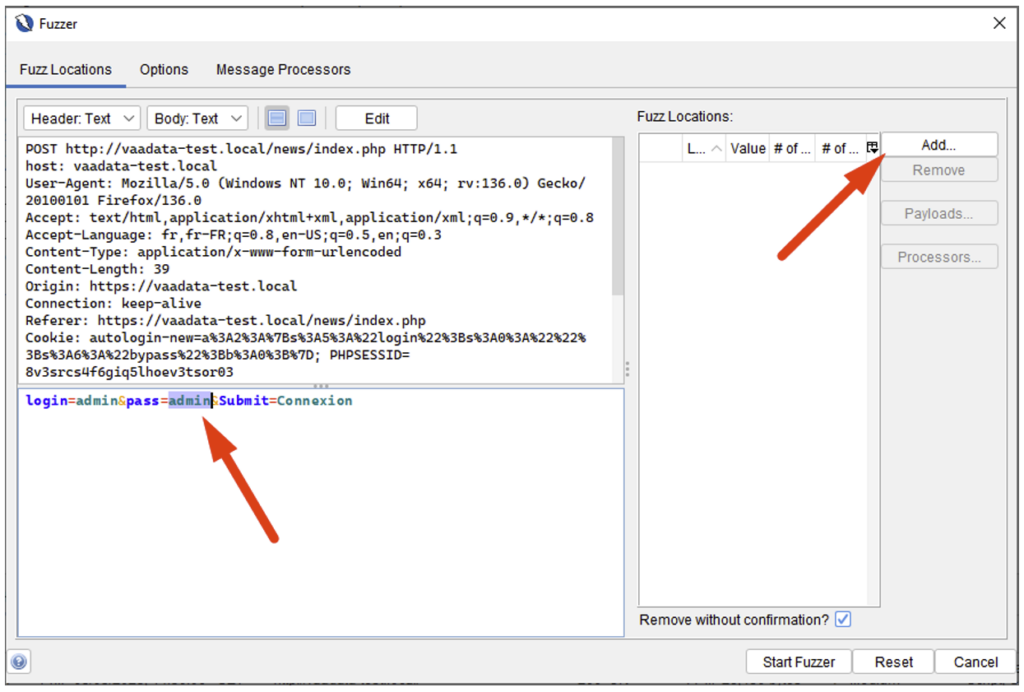
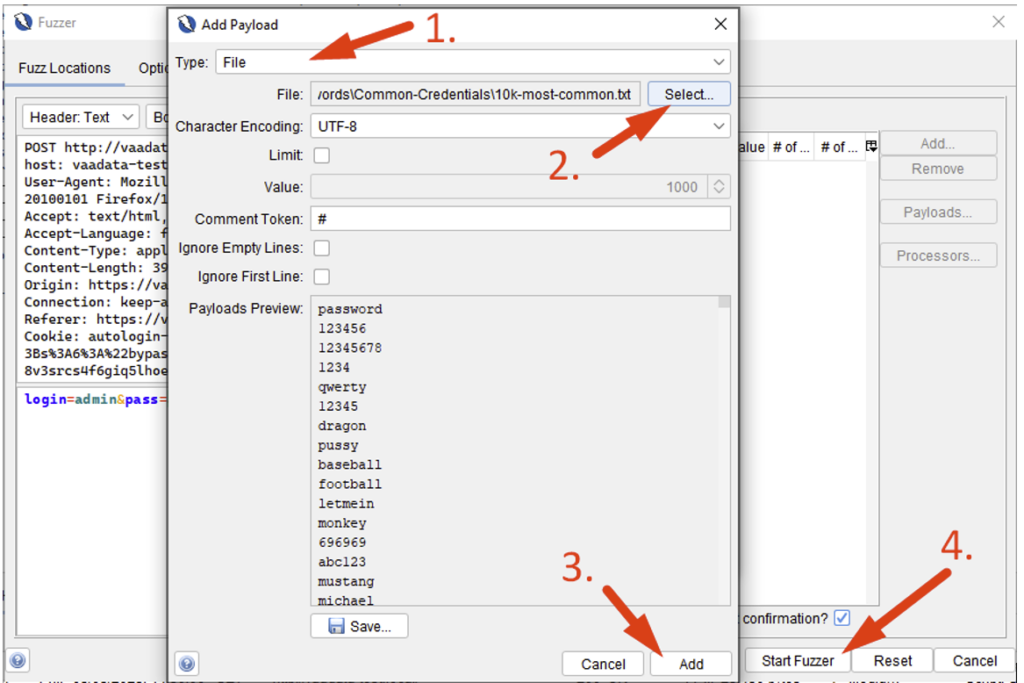
In the window that opens, all you have to do is choose your dictionary (you can choose a text file, for example), then launch the Fuzzer:
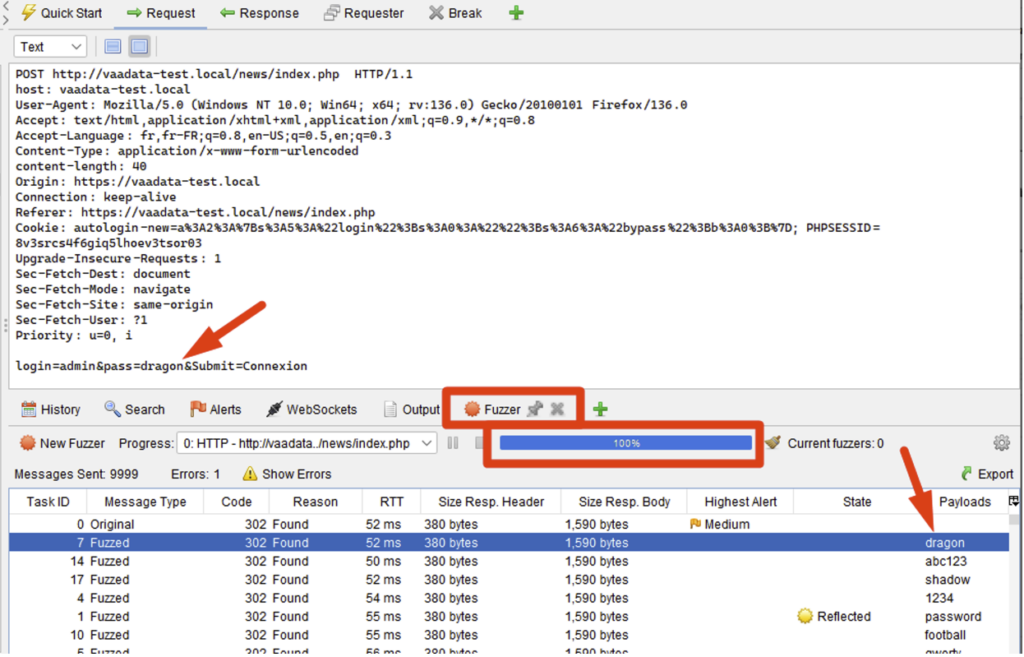
The results will then be displayed in the new ‘Fuzzer’ tab in the interface:
For slightly more complex cases, it is also possible to define several different entry points (in this case, all combinations will be sent), and to modify the payloads before sending them (encoding, adding a prefix/suffix, etc.).
Active Scanner
The advantage of ZAP over the Community version of Burp is that it has a vulnerability scanner.
The passive scanner is activated by default. It analyses traffic continuously and creates alerts when suspicious elements are detected.
The active scanner can be triggered by the user in several ways:
- Either by activating Attack mode (Live scan): the scanner will automatically scan all URLs that appear in the scope. As a reminder, we do not recommend this approach, as it risks damaging the platform.
- Or by selecting a specific request and choosing Attack > Active Scan…
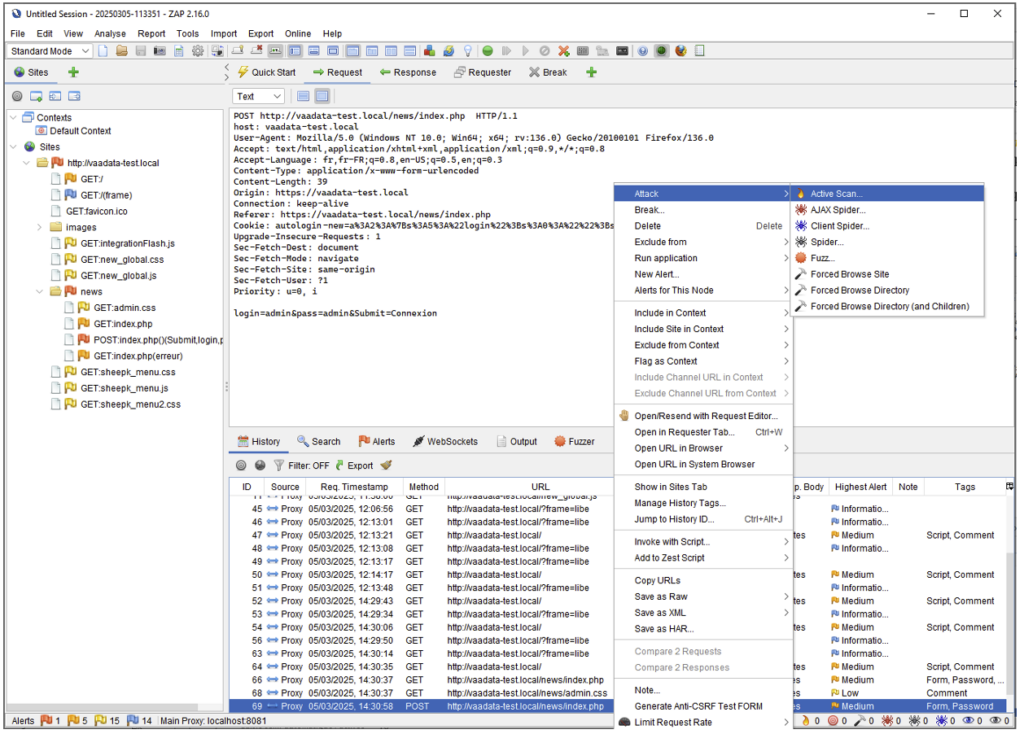
Once the feature is open, you can either scan the entire request, or specify the parameter/field/location you wish to scan.
The first case is the default behaviour, so all you have to do is start the scanner by clicking on ‘Start Scanner’.
In the second case, go to the Custom Vectors tab, select a field by highlighting it (or an empty space) and then click Add. Also tick the ‘Disable Non-custom Input Vectors’ option so that the scanner only applies to the field(s) selected.

When the scan starts, the Active Scan tab opens and displays all the requests sent by the scanner. If you select one of them, you will see that the payloads are sent only to the field requested:
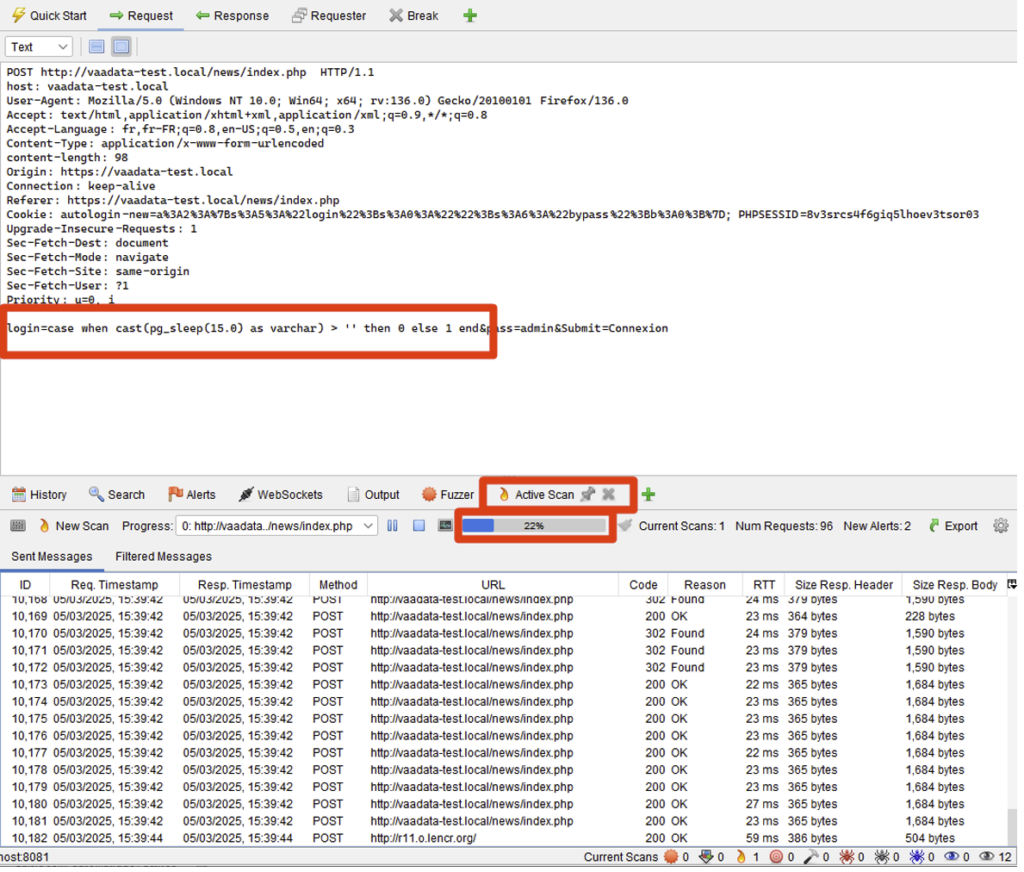
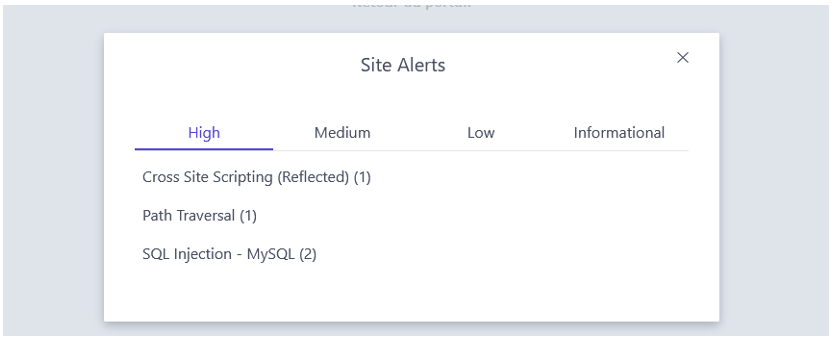
The results are then displayed in the Alerts tab:
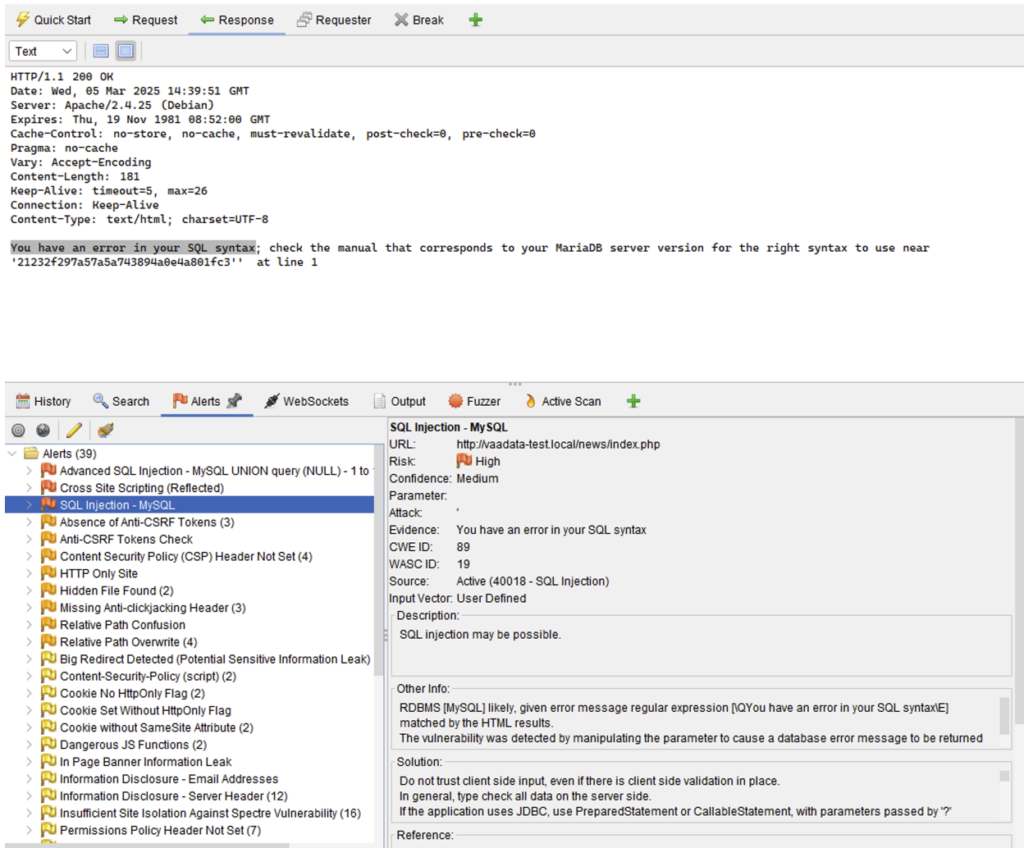
The scanner discovered (among other things) an SQL injection. Better still, it was able to determine a UNION payload that can be used to extract data from the database.
Spidering
Spidering enables you to browse the structure of an application, in order to discover as many existing routes/parameters as possible.
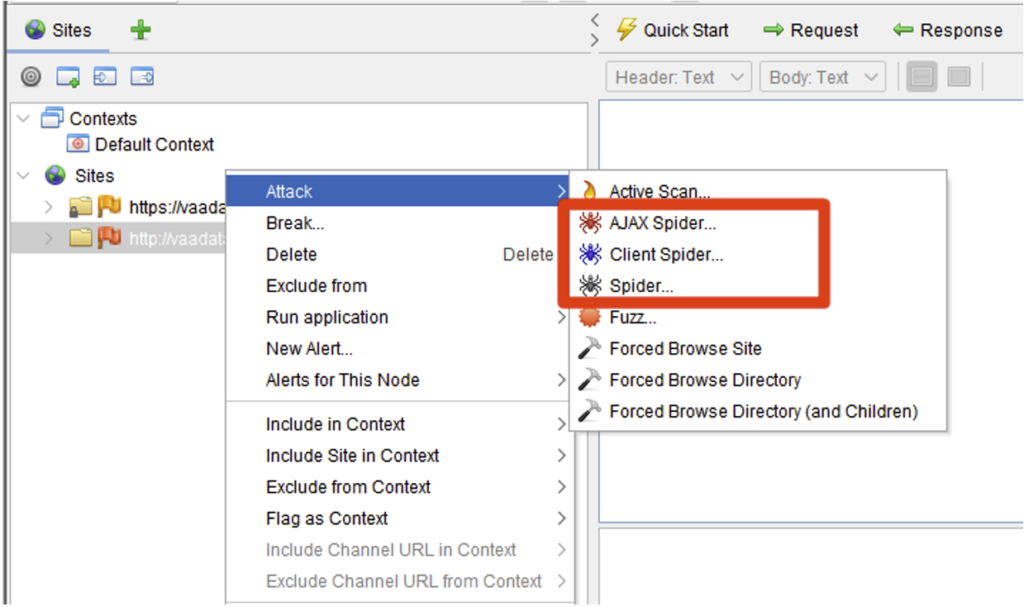
To launch ‘classic’ spidering (crawling the website using the links that appear on the various pages) on a site, simply select the target in the Sites menu, then choose Attack > Spider…
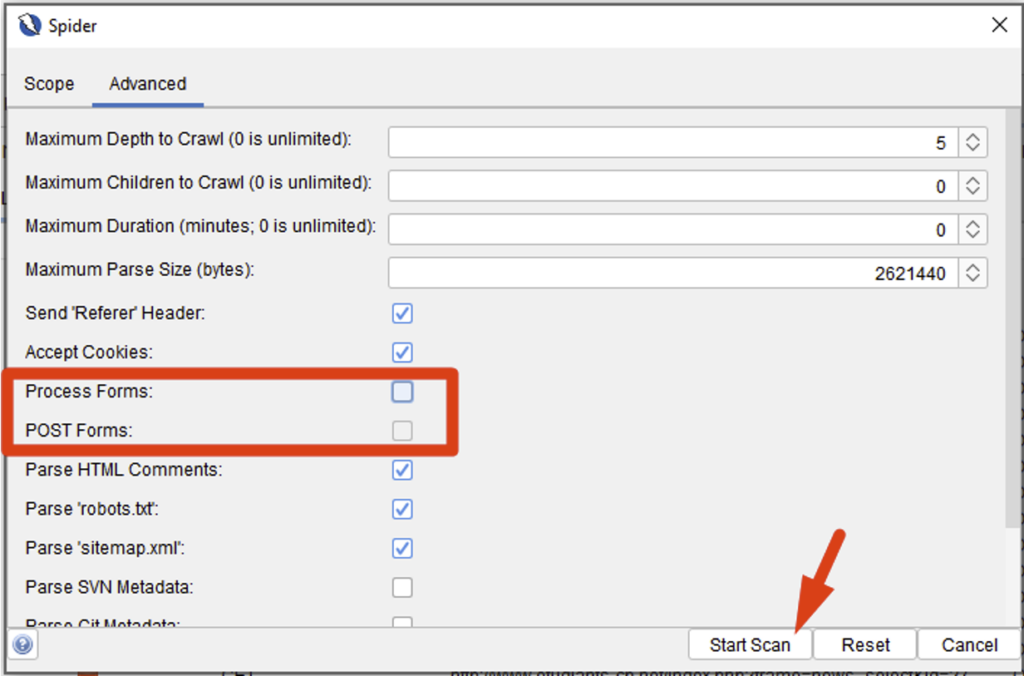
By default, forms are submitted by the tool, which can have an impact on the platform. To disable this option, check the ‘Show Advanced Options’ option, then in the Advanced tab, uncheck the ‘Process Forms’ and ‘POST Forms’ options:
The requests sent by spidering are then visible in the Spider tab, and the site map is also updated according to the pages visited in the Sites side panel:
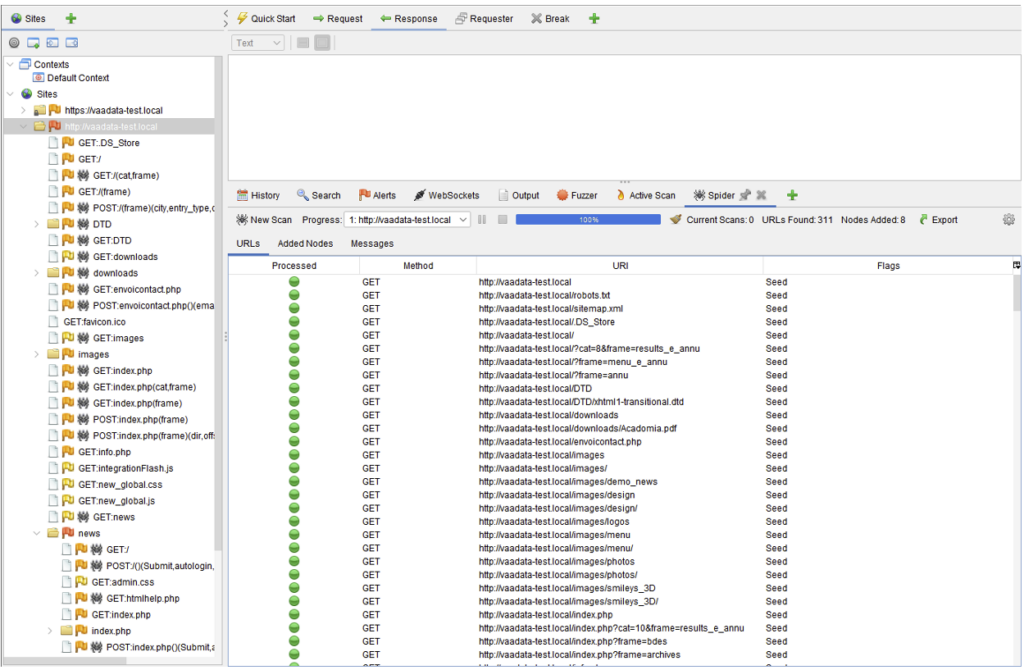
This type of spidering is particularly fast (a few seconds on our test site).
ZAP also has another type of spidering called ‘AJAX Spider’. This works on a different approach: known URLs are opened in a web browser, so that JavaScript code can be executed, and AJAX requests (if any) can be used to load data. The DOM is then analysed by ZAP in order to extract any URLs that may be present.
This type of spidering is much more time-consuming, as it relies on opening browsers and interpreting code, but can be effective for modern applications that rely on a JavaScript front end and AJAX requests to the back end.
Finally, the ‘Client Spider’ is a new feature in version 2.16 of ZAP (January 2025). It will eventually replace the AJAX Spider, which is based on technology external to ZAP.
ZAP extensions
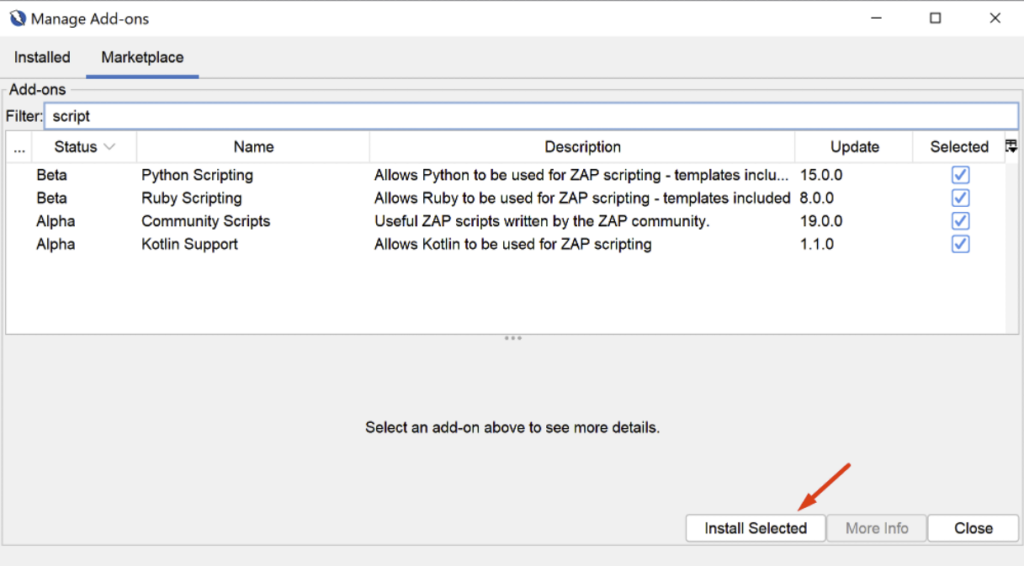
ZAP has a Marketplace that lets you simply add extensions to the tool.
You can open the marketplace by clicking on the ‘Manage Add-ons’ button in the toolbar:

The marketplace contains a wide range of extensions: adding tests to the scanner, adding options to the various features, adding a language package, adding visual effects to enhance the interface, and so on.
To install an extension, simply select it in the marketplace, then click on ‘Install Selected’:
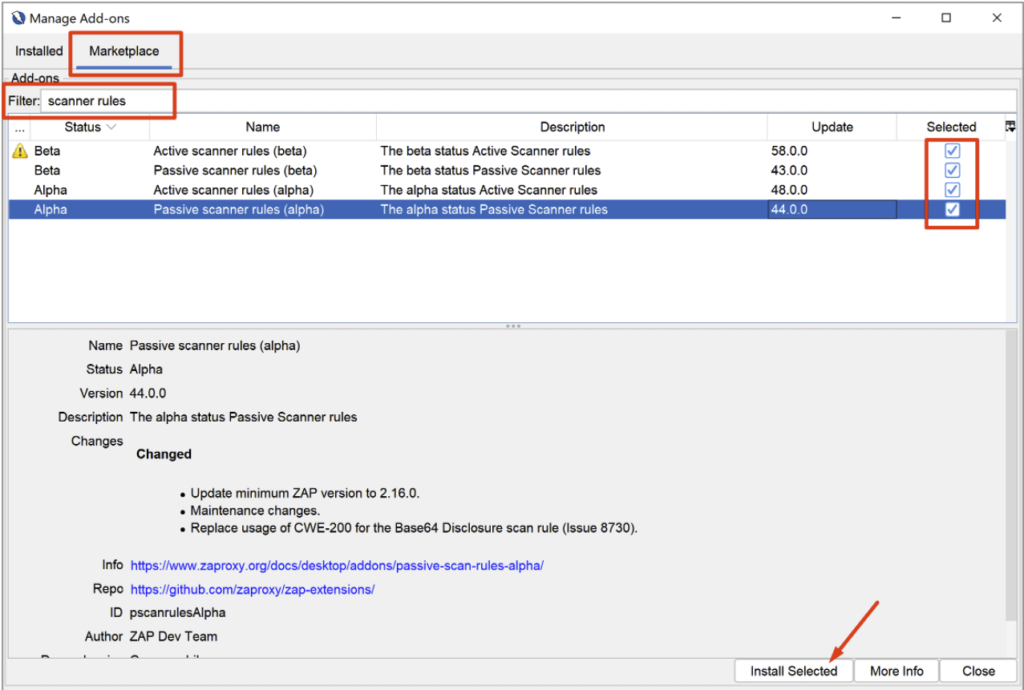
Some extensions we can recommend: Active scanner rules, Passive scanner rules and Community scripts.
Limits and Scripting
We have seen that ZAP has all the features needed in a web interception proxy, which are perfectly functional in relatively simple use cases.
However, as soon as we move away from these simple cases, we find that we are quickly limited by the functions offered natively by the tool.
Two examples commonly encountered during an audit:
- No ‘Match and Replace’ functionality to automate the modification of requests and/or responses according to selected patterns.
- Request chaining, as could be done with BURP using Macros or the Stepper extension, which is essential in multi-step workflows.
To compensate for this lack of functionality, ZAP relies on a system of scripts, which in practice is rather tedious.
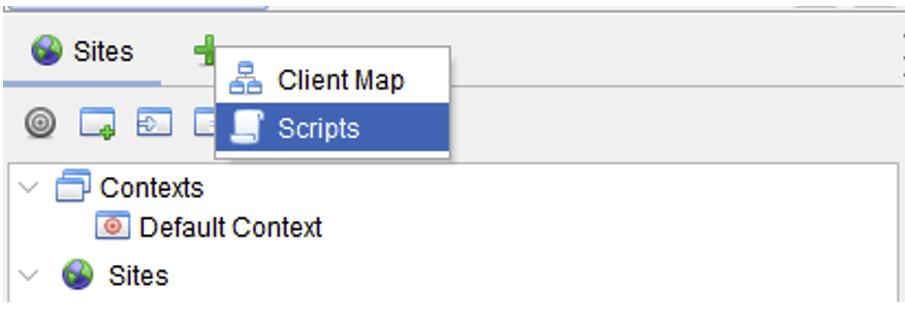
These scripts can be displayed by opening the Scripts tab next to Sites (click on ‘+’):
To maximise the number of scripts available, we recommend installing the following extensions:
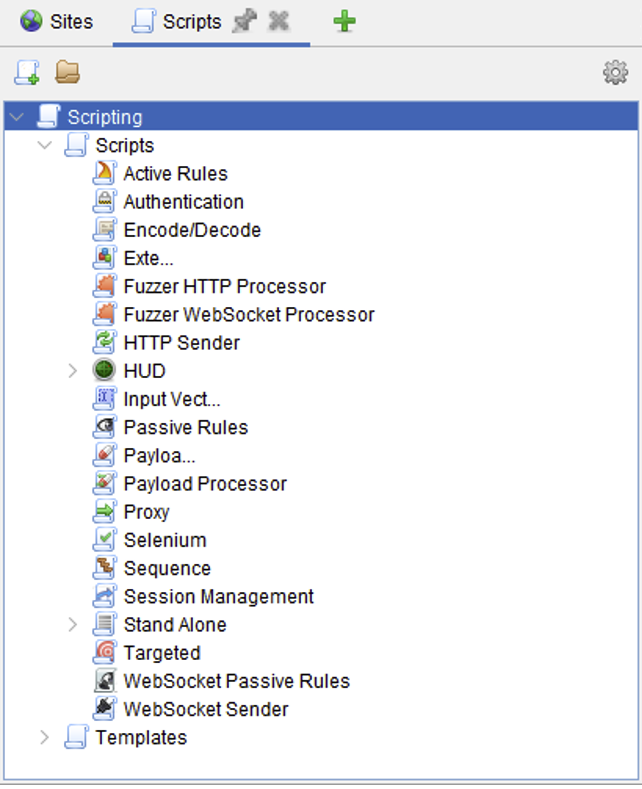
The scripts on offer are quite diverse and varied, and are applied in different ways depending on their nature.
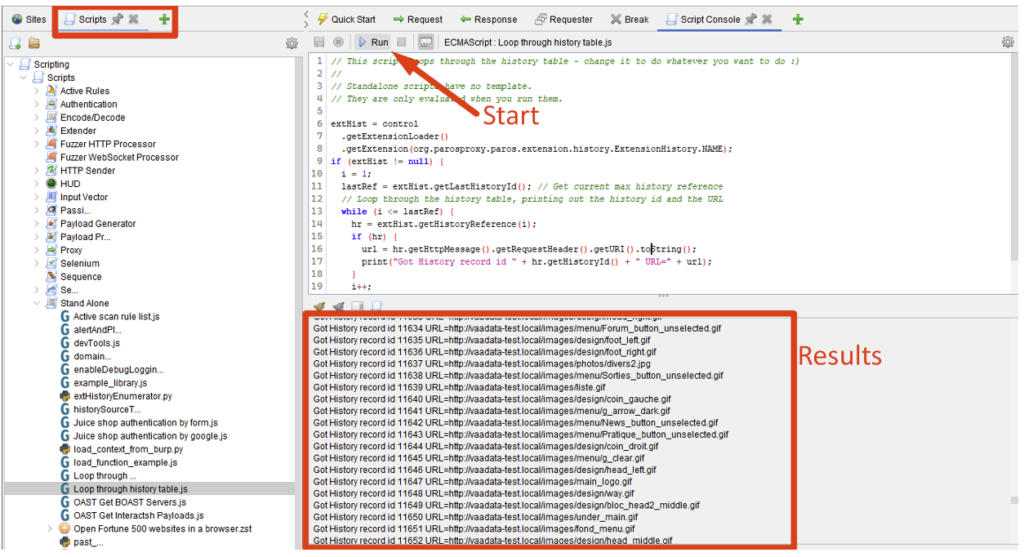
Stand Alone scripts
There are Stand Alone scripts that are applied on an ad hoc basis, in the general ZAP environment.
For example, the Loop through history table.py script will go through the history of the project and print out all the routes that have been visited.
Targeted scripts
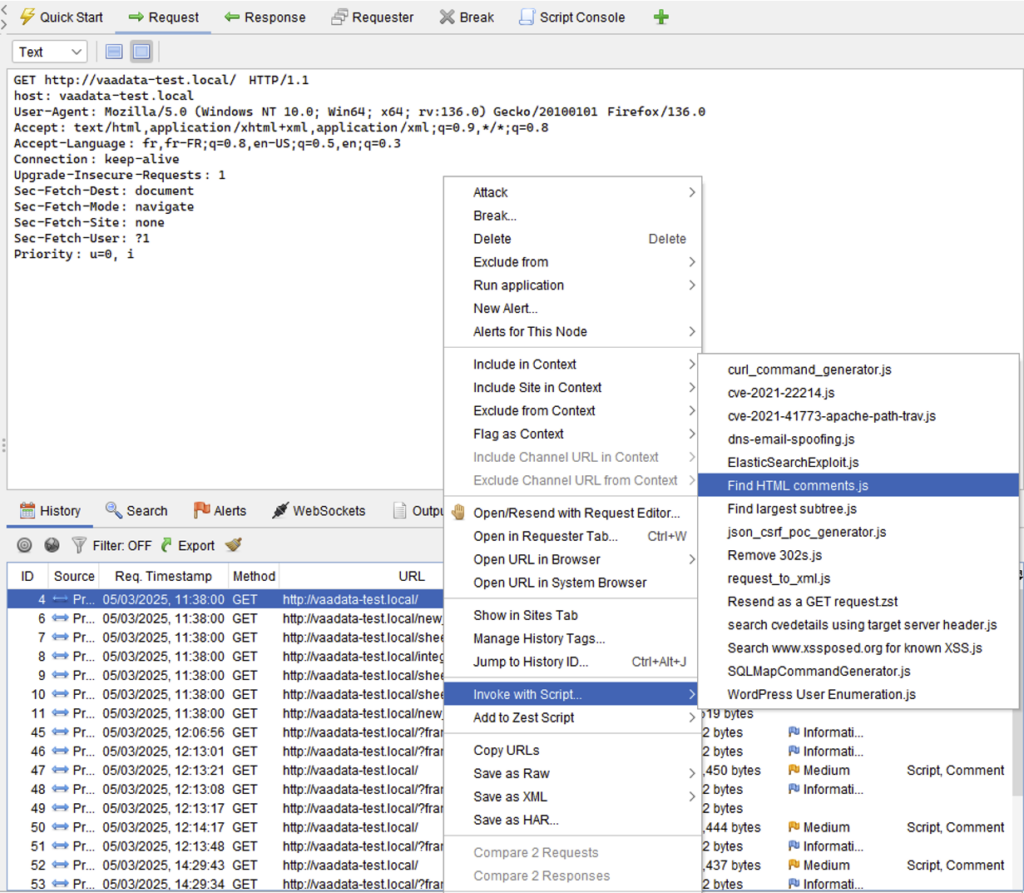
Other types of script (Targeted) are applied more specifically to a request/response selected by the user from the ‘Invoke with Script’ context menu.
The script action is then performed only on the selected exchange. For example: extract comments from a page:
Other scripts
Some scripts will be automatically triggered for each request/response: the script code may therefore contain controls to determine when the script should perform an action on the request or response.
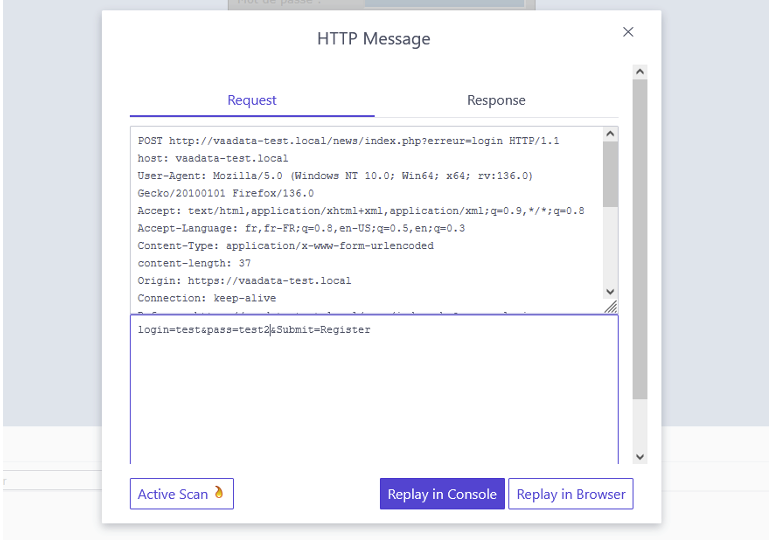
Let’s take the ‘Match and Replace’ example mentioned above:
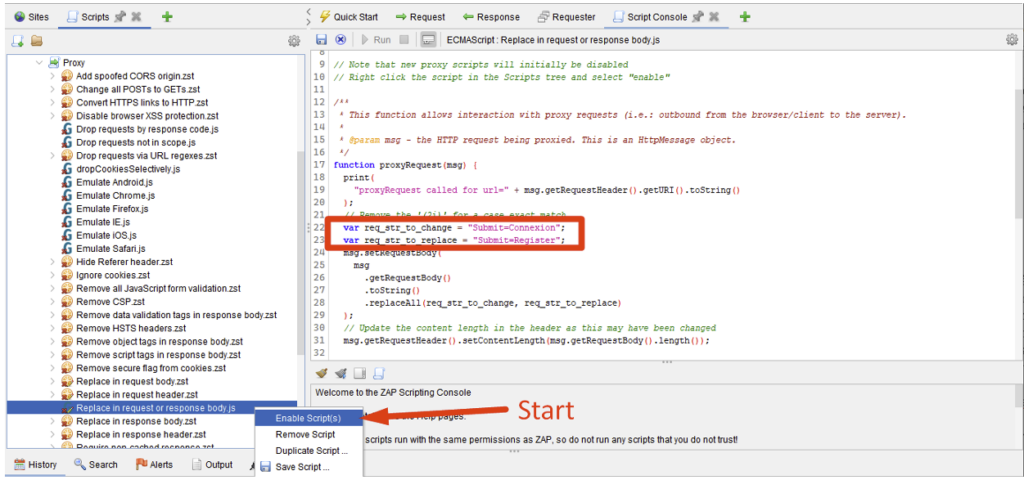
Once the script has been run, you can see that the changes are made automatically on the requests concerned (the Submit=Connection parameter is replaced by Submit=Register).

In short, scripts add flexibility when ZAP’s native functionality is limited. Users are free to develop their own scripts (several languages are possible), and the community makes available (via the marketplace) useful scripts for carrying out relatively common actions.
However, the use of scripts proves tedious (duplication of the same script when several ‘Match and Replace’ operations are required) when a simple function could do the trick.
What’s more, script execution is not very clear in the interface (in the previous example, the request is indeed modified, but nothing indicates this). Above all, this is again limited to simple cases (one-off modifications for example), but doesn’t seem to be sufficient for complex applications (macro, Stepper, AuthAnalyzer).
The ZAP HUD: a Graphical User Interface Directly in the Browser
ZAP offers a second graphical interface, directly integrated into the user’s browser.
This HUD (Heads-Up Display) is a real asset, enabling actions to be carried out without having to juggle between the browser and the proxy. A unique feature that Burp does not offer.
To activate the HUD, simply tick ‘Enable HUD’ when launching the browser via ZAP or click on ‘Enable the ZAP HUD’ in the toolbar.

Once activated, the interface is automatically added to the browser. You should see the following home page:
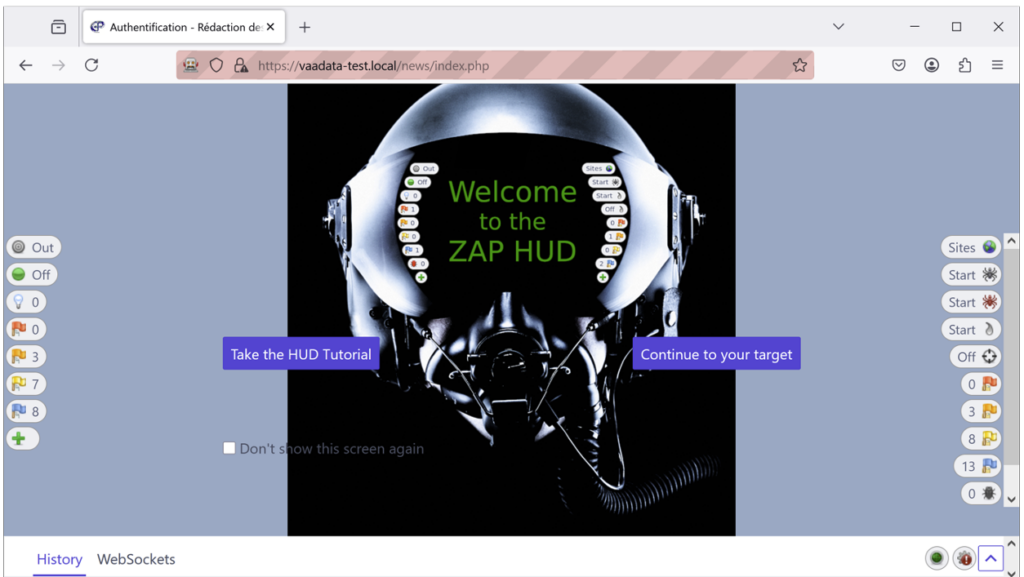
To display the HUD tutorial, click on the button on the left. Otherwise, select ‘Continue to your target’ to go directly to the site to be tested.
The major advantage of this interface is that you can access ZAP information without leaving the browser. You can view the history of requests and WebSockets, see scanner alerts, and perform actions such as scanning, spidering or breakpoints, all without having to switch between several windows.
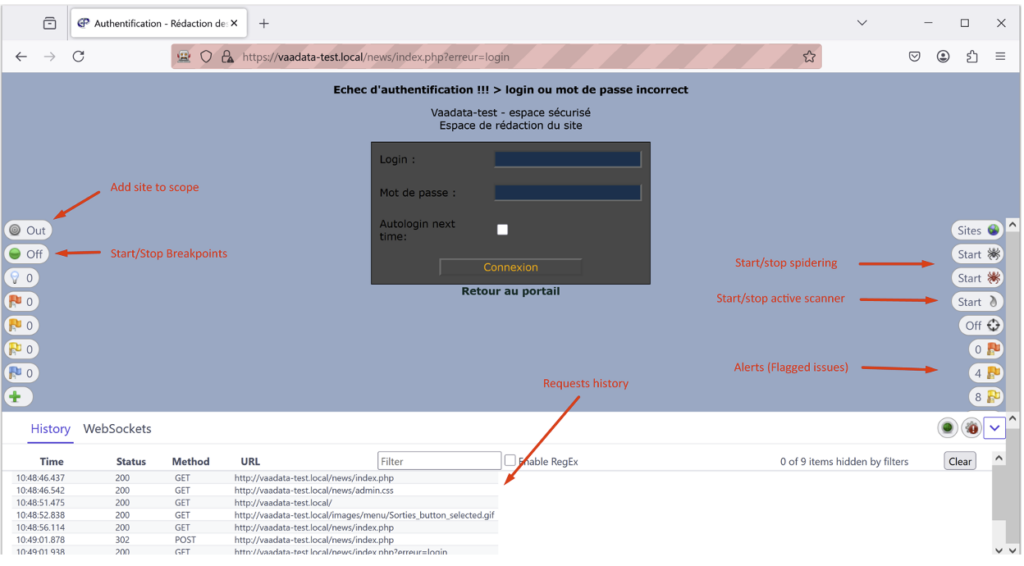
By clicking on a request in the history, you can view the details of the request and, for example, choose to modify and resend it or launch an active scanner.
We can also display alerts raised by ZAP (which appear in real time in the HUD via notifications):
Conclusion
ZAP is well equipped for the classic uses of a web proxy: observing, intercepting and generating HTTP traffic, either manually or automatically. It also incorporates a high-performance active scanner that can be used with precision. Its HUD is a notable asset, offering greater comfort and making it easier to learn for novices who haven’t yet mastered the standard interface.
Compared with the Community version of Burp Suite, ZAP stands out. Burp does not offer a vulnerability scanner or project backup, and imposes restrictions on certain features, such as Intruder.
However, ZAP remains limited for professional use. It is more suited to one-off needs: testing your own website, taking part in CTFs and other Web challenges, etc.
Author: Cédric CALLY-CABALLERO – Pentester @Vaadata